![](https://tanakasan0921.com/wp-content/uploads/2022/06/外部リンク①-1024x596.png)
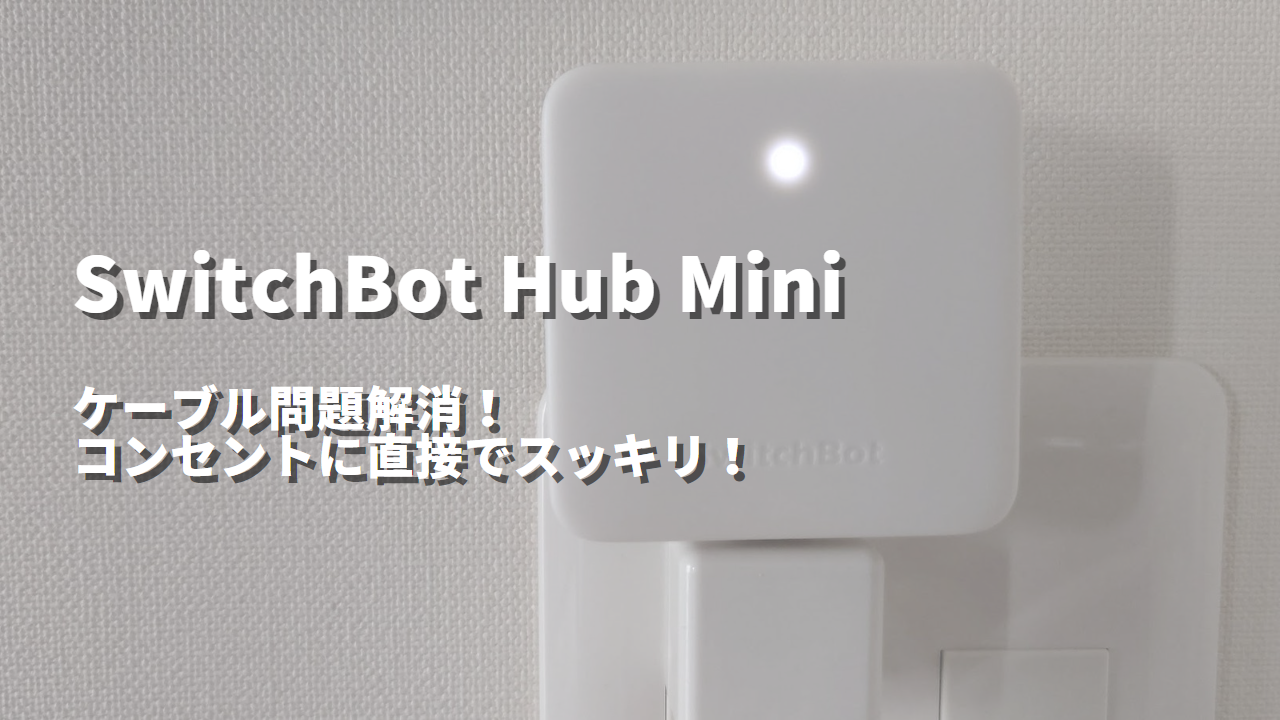
【SwitchBot Hub Mini】壁掛けより便利!スッキリ設置する方法!
![](https://tanakasan0921.com/wp-content/uploads/2023/06/SwitchBot-Hub-Mini-ケーブル問題-解消.png)
![](https://tanakasan0921.com/wp-content/uploads/2022/02/田中さん-通常-150x150.png)
どうも!田中さん。(@TAR0222)です!
スマートデバイスを活用したスマートホーム化を目指しています。
その中でも、一番初めに購入し、今ではデバイスの核ともなっているのが「SwitchBot Hub Mini」です。
![](https://tanakasan0921.com/wp-content/plugins/pochipp/assets/img/pochipp-logo-t1.png)
リモコンをスマホで操作できる様になる「スマートリモコン」で、非常に便利なんですが少し気になった点がありました。
それが設置時に発生する「配線問題」です。見える位置に置く事が多いデバイスなので配線が気になっていました。
![](https://tanakasan0921.com/wp-content/uploads/2023/02/田中さん-疑問-150x150.jpg)
「Hub Miniの設置はどうしてるの?」
「Hub Miniの配線を綺麗にする方法は?」
本記事では、その様な疑問に答える内容になっています。
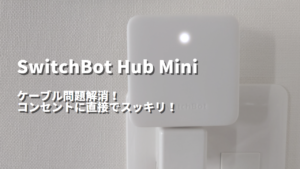
本記事で紹介する方法で設置すればコンセントに直で設置でき、配線も無くスッキリさせる事ができます。
はっきり言って壁掛けにするより便利でスッキリするのでおススメです。
SwitchBot Hub Mini – 配線をスッキリさせる方法
それでは配線をスッキリさせる方法を紹介していきます。
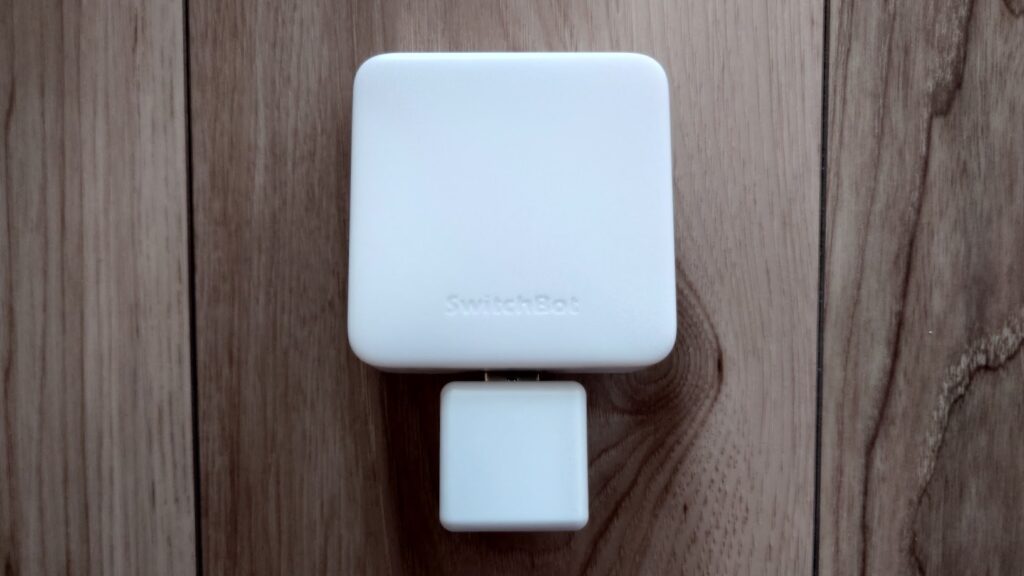
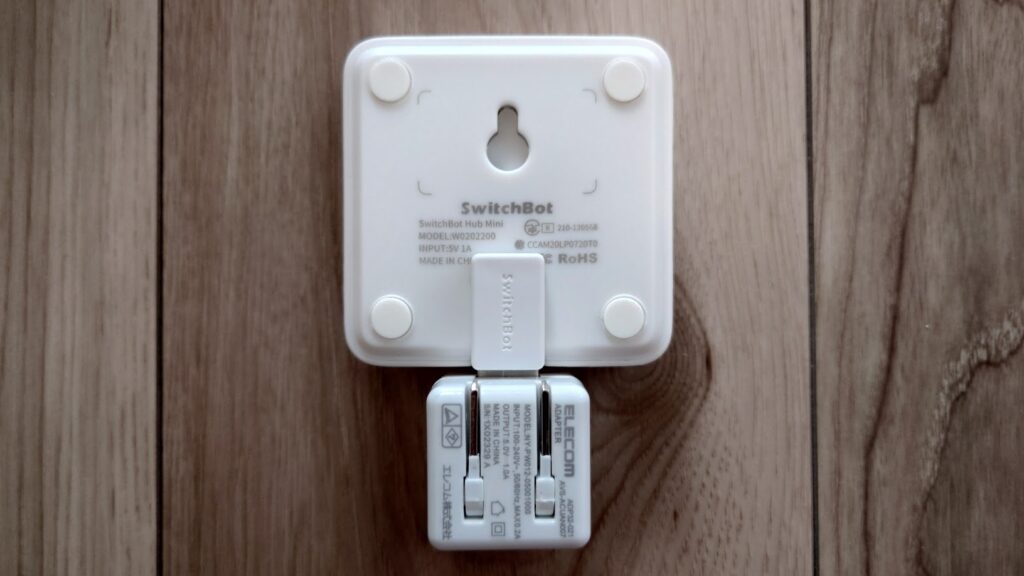
はじめに、結果を紹介。今回の方法で配線処理を行い設置すると次の様になります。
![](https://tanakasan0921.com/wp-content/uploads/2023/06/20230516_072740-1024x576.jpg)
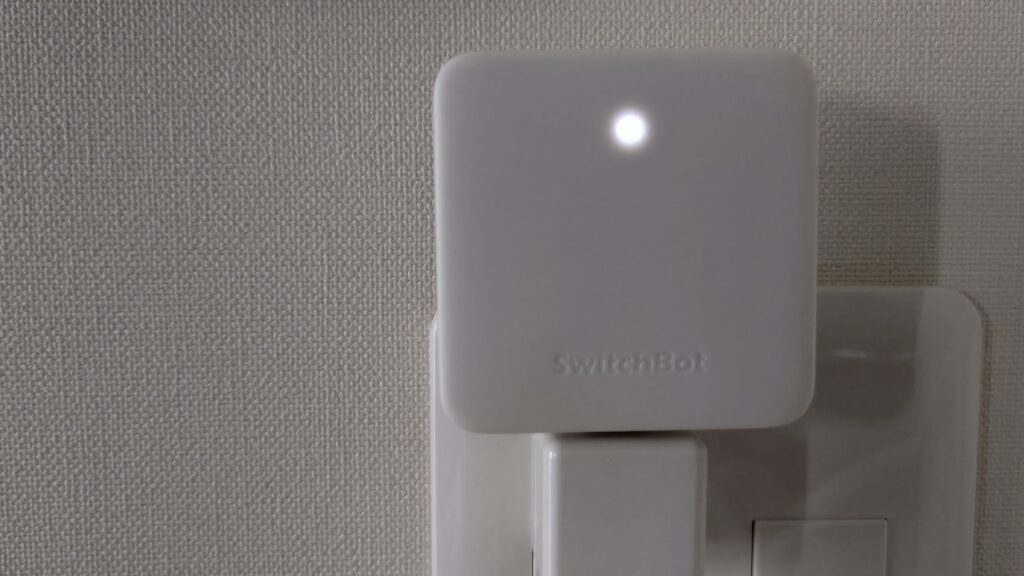
どうでしょうか?配線が無くスッキリ設置できていませんか?
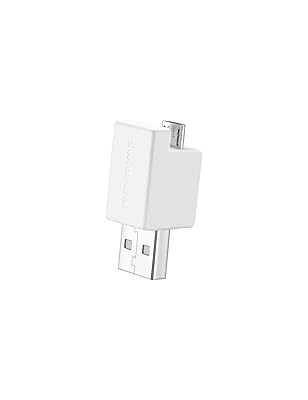
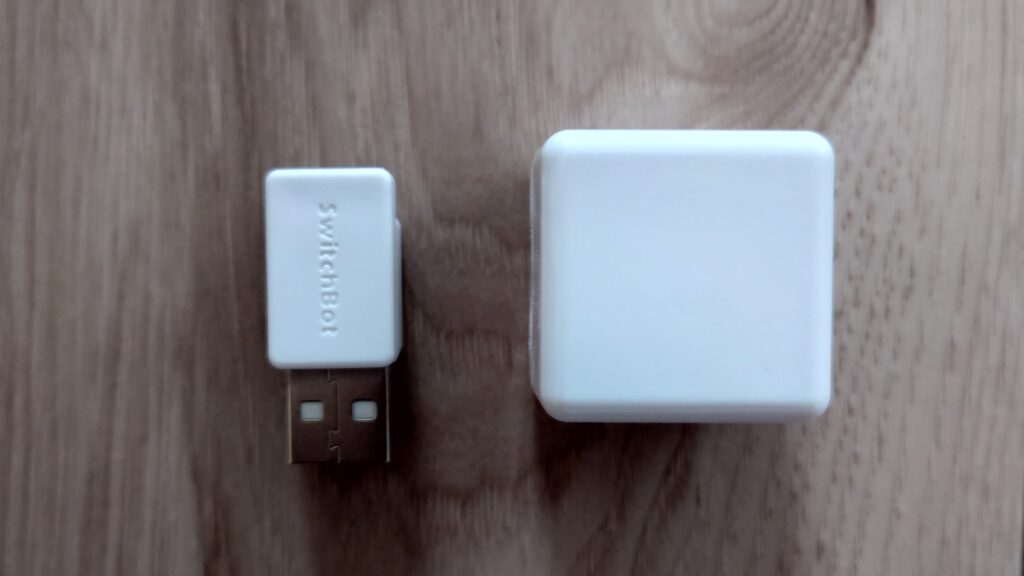
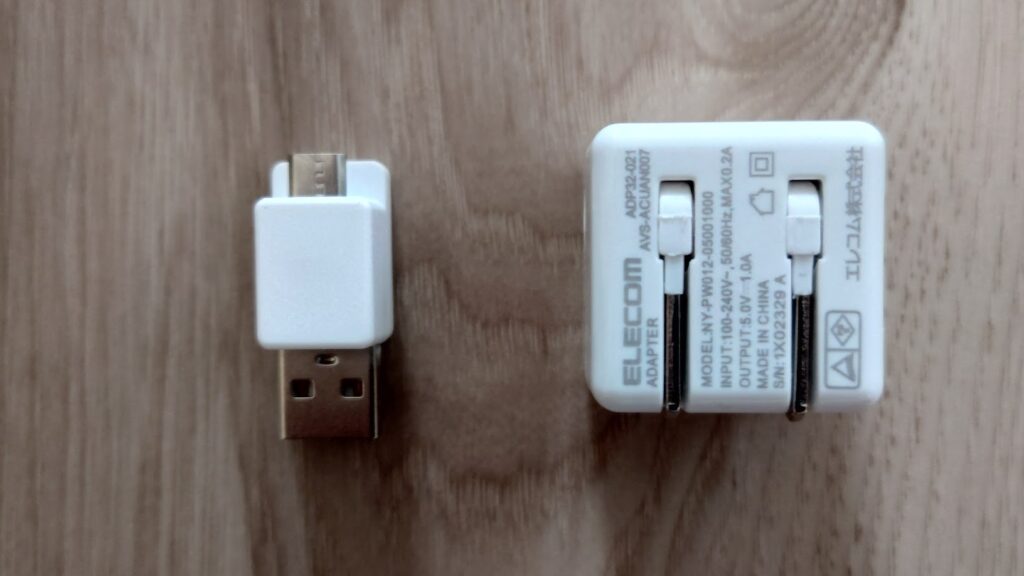
今回、配線処理を行うのに使用した物が次の2点になります。
![](https://tanakasan0921.com/wp-content/plugins/pochipp/assets/img/pochipp-logo-t1.png)
「micro USB-A to USB-Aの変換コネクタ」が「switchbot純正品」で存在しますので、それを使用します。
エレコムのプラグ折り畳み式のAC充電器と組み合わせると配線無しでコンパクトに設置できる訳です。
![](https://tanakasan0921.com/wp-content/uploads/2023/06/20230606_0859132-1024x576.jpg)
![](https://tanakasan0921.com/wp-content/uploads/2023/06/20230606_0859562-1024x576.jpg)
![](https://tanakasan0921.com/wp-content/uploads/2023/06/20230606_090111-1024x576.jpg)
![](https://tanakasan0921.com/wp-content/uploads/2023/06/20230606_0901352-1024x576.jpg)
非常に簡単かつスマートに配線を無くすことができるのでおススメです!
![](https://tanakasan0921.com/wp-content/uploads/2022/02/田中さん-通常-150x150.png)
こういう製品が純正品で存在するのが嬉しいです!
さいごに
今回は「SwitchBot Hub Mini」の配線を無くしてスッキリ設置する方法について紹介しました。
今回の方法だと、配線を綺麗にまとめるどころか、配線が無くなるので本当にスッキリします。
スマートホーム化を目指す上で、可能な限り配線もスマートにしたいですよね。
今回の記事が参考になりましたら幸いです。それでは、また!
![](https://tanakasan0921.com/wp-content/plugins/pochipp/assets/img/pochipp-logo-t1.png)